UI testing always seems to be the one 'thing' that is difficult to setup in LabVIEW.
User RyanV, NI forum, June 24th, 2016
LabVIEW is a popular software development environment for data acquisition, machine control and industrial automation, used in a number of diverse engineering settings. LabVIEW is graphical in nature: its programs, also called VIs, or Virtual Instruments, comprise a front panel, or the user interface of the VI; and a back panel, or the graphical source code of the VI, represented in a block diagram.
LabVIEW programs range in complexity. They can be as simple as a VI which adds two numbers, or one which requires such precision to be used in, e.g., safety-critical aerospace applications. Like any software with a graphical front end, the user interfaces of LabVIEW applications benefit from testing, and, better, automating these GUI tests.
We show you how to test the user interfaces of LabVIEW applications using a robust, automated approach with the Squish GUI Tester.
UI Testing LabVIEW Apps: A Combined Approach
For UIs with custom, non-standard controls for which an object-based control recognition approach would not suit or is not possible, Squish offers both image-based testing and OCR-based testing. (For a quick rundown on what OCR-based testing is and how it works, read this.) Even better, a test author can combine the latter two approaches in a single test case and use their functionalities in a complimentary manner. We'll use this approach for testing an example LabVIEW VI.
Scope & Pre-Requisites
We'll use the Control References example VI delivered with LabVIEW. Our test authored in Squish will cover the steps listed in the app under the Instructions header. This blog covers the how-to behind using image- and OCR-based testing methods; for a tutorial on getting started with Squish, we refer you to our documentation. Note that in order to activate the OCR functionality in Squish, prior installation of the Tessearct OCR library is required.
Recording the Test
- Run the VI Once the recording starts, Squish launches the application automatically.
- Change the Disabled Status / Click the Visibility button
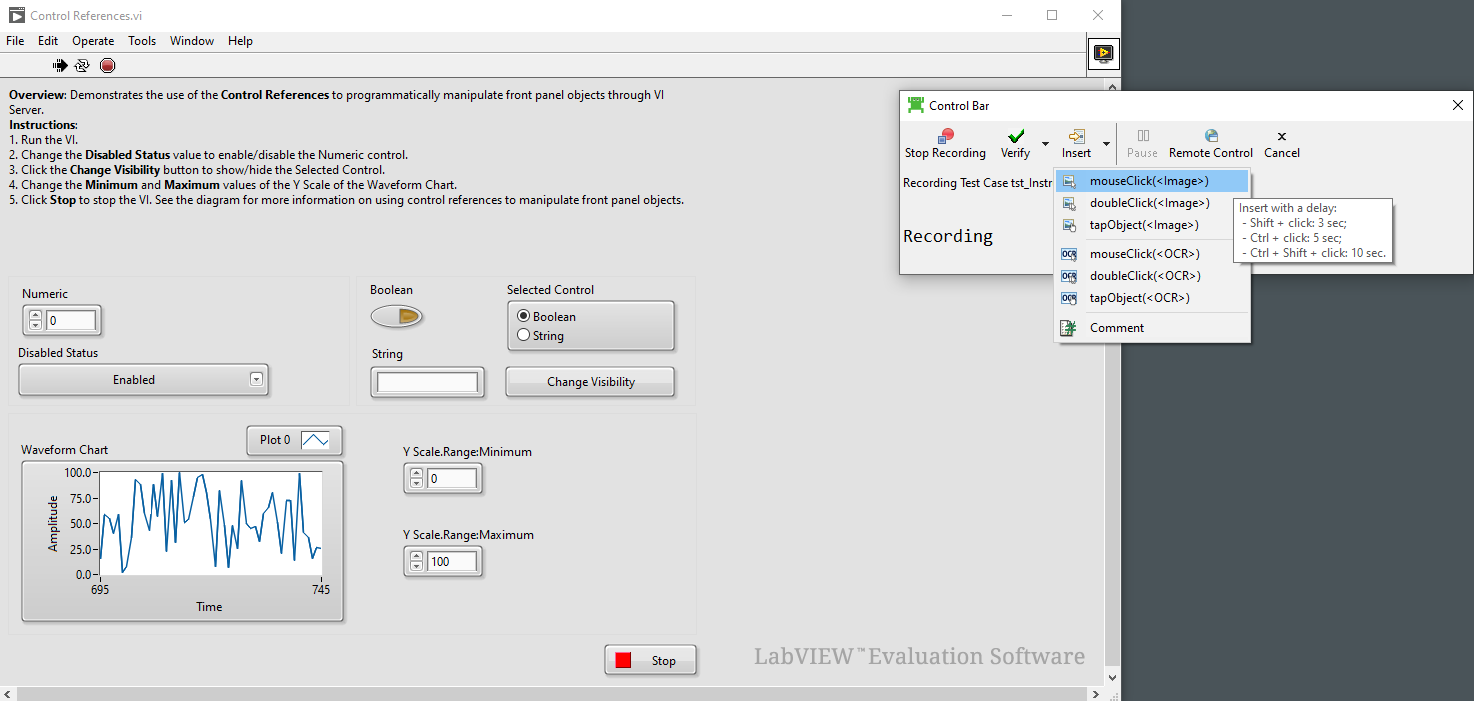
To change the status, we are going to use an image-based approach. Using the Squish IDE control bar, select Insert and mouseclick(<Image>), and take a screenshot of the Enabled button.

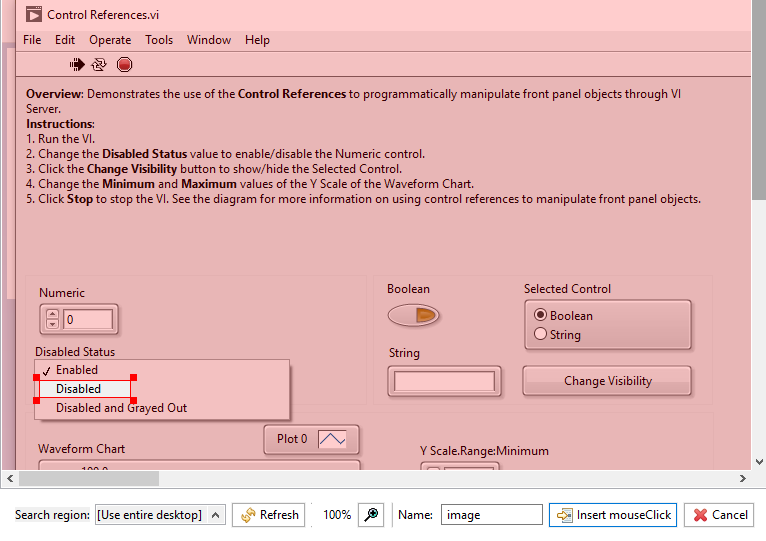
Once the screenshot is ready we need to take another screenshot: one of the Disabled option. Press the Ctrl key, and select mouseClick(<Image>). This gives you five seconds to expand the Disabled Status list before Squish takes the screenshot.

Use the same approach to click the Visibility setting, instead taking a screenshot of the Change Visibility button.
- Change the Minimum and Maximum values of the Y Scale of the Waveform Chart
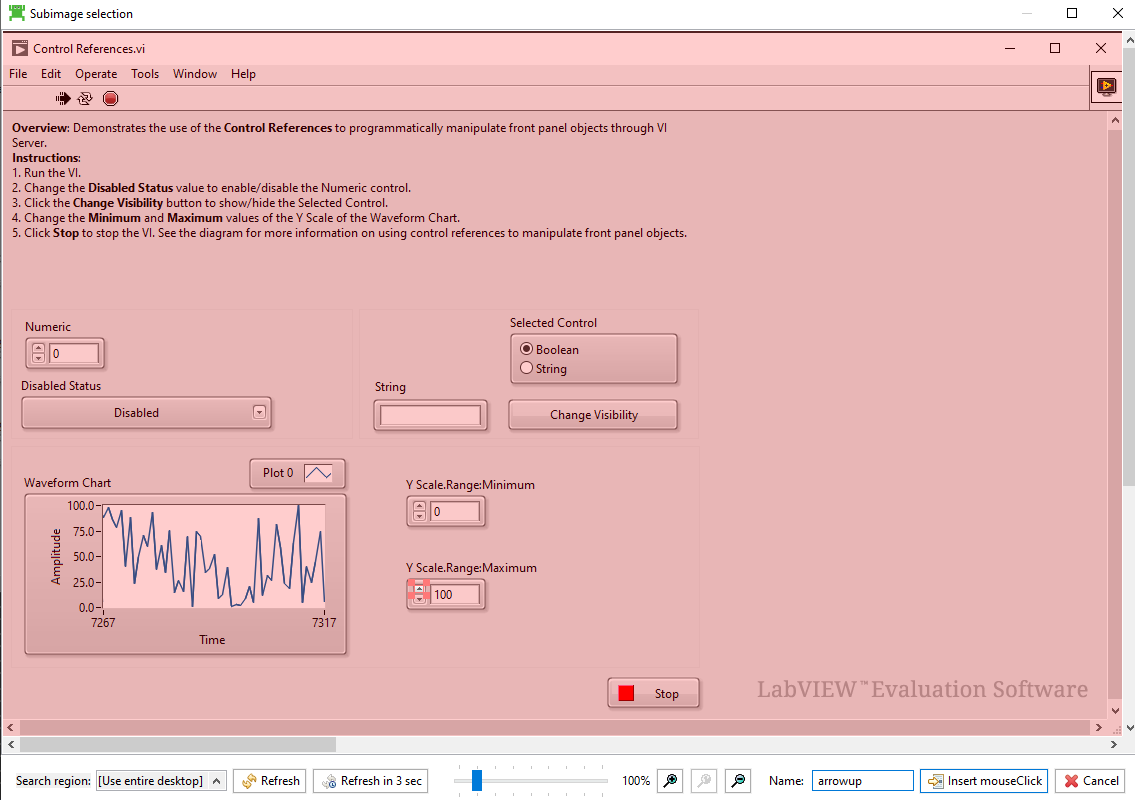
Note that the X and Y scales' up arrows are identical. How can we tell Squish to differentiate between the two upon test replay? Using the artificial occurence property. Upon accepting the selection in the screenshot dialog, Squish will search the desktop, find all positions matching the selection and compute the occurence index. The index is recorded as part of the waitForImage call. It's therefore important to select the specific image of interest, even if there are other identical occurences of it on the screen.


- Stop the VI
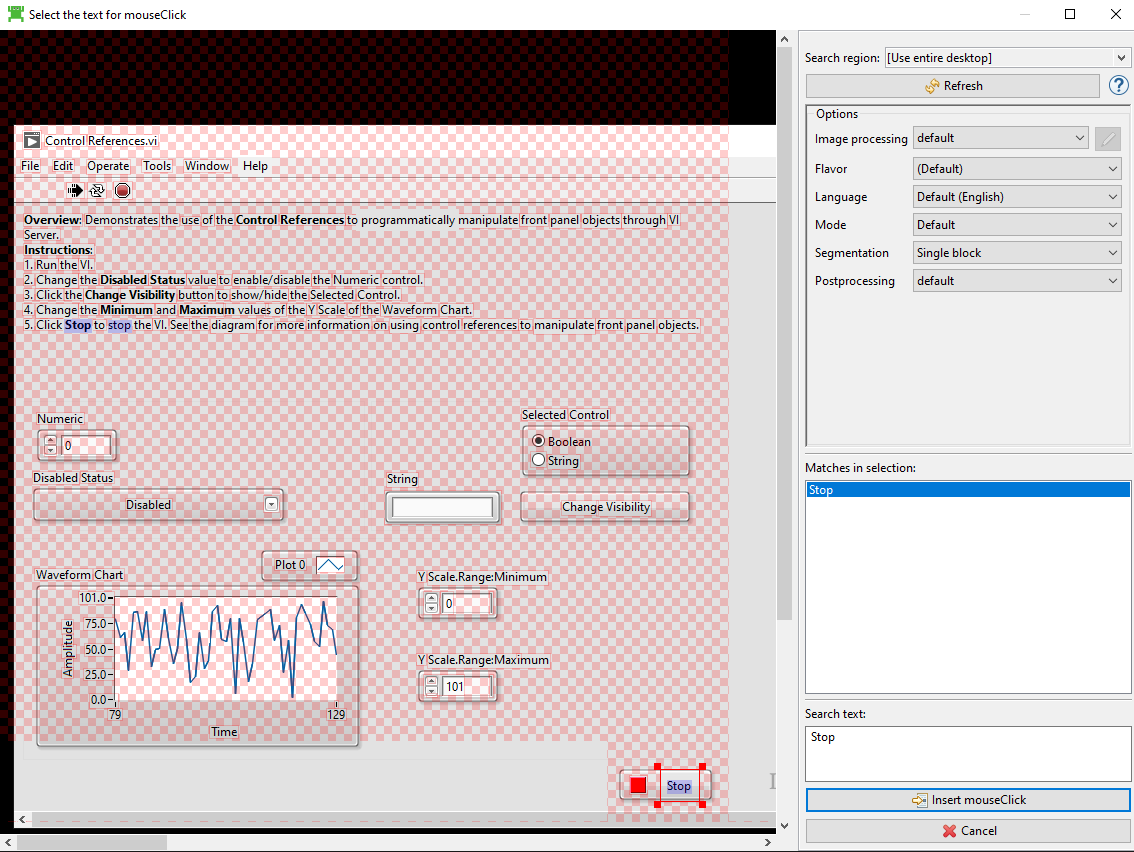
To stop the VI, we'll use the OCR-based lookup. In the IDE control bar, select Insert and mouseclick(). When the screenshot processing is complete, select the Stop button, check if the Stop text was recognized, and insert the mouse click with default OCR settings.

The test is ready for replay.
Outlook & Further Reading
Although we had no access to the LabVIEW application objects or their properties, we were still able to automate a simple test for the application using a combined image- and OCR-based testing methodology. This test could easily be extended to include image- or OCR-based verification points.
For more information on image-based testing and OCR, check out our tutorials and release webinars (1, 2) dedicated to the topics on our YouTube channel.
Test Documents
You can download the test script and associated files here.


