Providing users with an easy way to deliver feedback, report software bugs and request enhancements is important for making application developers aware of the existing problems their users face. At the same time, it's equally important to motivate users to submit descriptive bug reports as it not only makes bug triage by the support team easier, but more importantly, enables developers to respond quickly and reproduce and fix issues more efficiently.
It has always been possible to contact the Squish team to report issues or request support by e-mail. Yet this was not as frictionless of an experience as it perhaps could have been: collecting information required for a descriptive support case (license data, archive containing support information, screenshots, error messages, logs, etc.) was scattered throughout several places in the Squish IDE. Not having these attached to the initial report often resulted in some unnecessary back and forth between the Squish support team and the bug reporter.
In Squish 6.7, we brought some of these points of collecting relevant support information under one roof and introduced the Squish support request IDE wizard. In three simple steps, it guides the user through the process of contacting our support team with their bug report, enhancement request or technical question.
Using the Squish Support Request Wizard
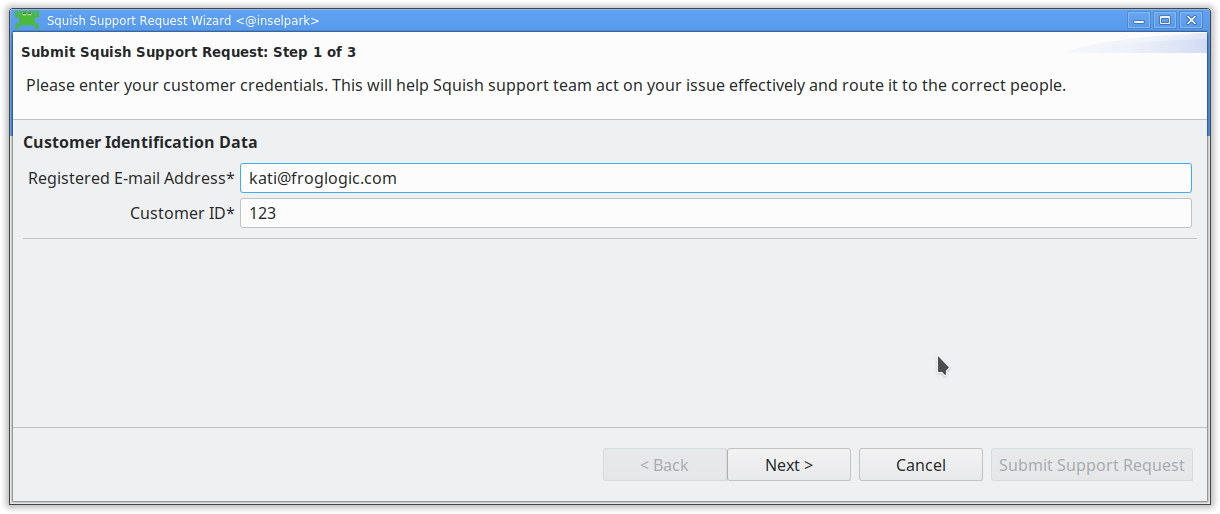
Step 1: Customer Identification
In the first step, users are required to enter their e-mail address as registered with Squish support (Floating Licensees can enter any e-mail address.) The customer ID field is pre-populated and will be uploaded with the request, as this helps the support team associate the request with the customer account and route it to the right person effectively.
Step 2: Request Description
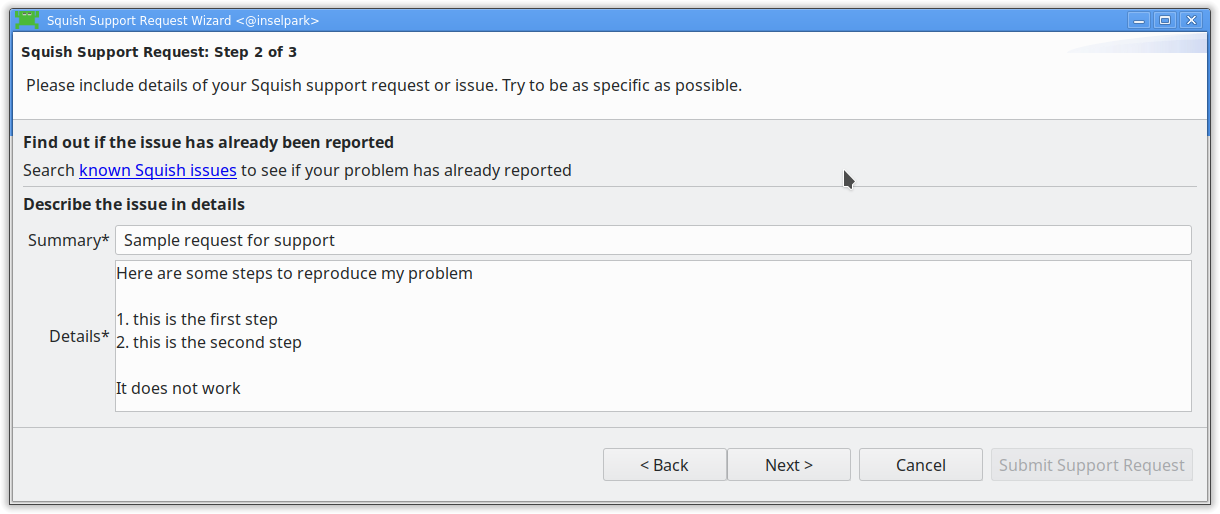
The second step is the core of the support request. Here, users have the possibility to outline their issue briefly and describe it in detail. This could include concrete steps to reproduce a bug or error messages and logs as they appear.
As some problems users report might already be known to the Squish support team, this step also provides a link to the list of known issues for the actual Squish version. The link opens in an external web browser and contains possible workarounds, whenever those are available.
Step 3: Attaching Support Information, Screenshots and Logs
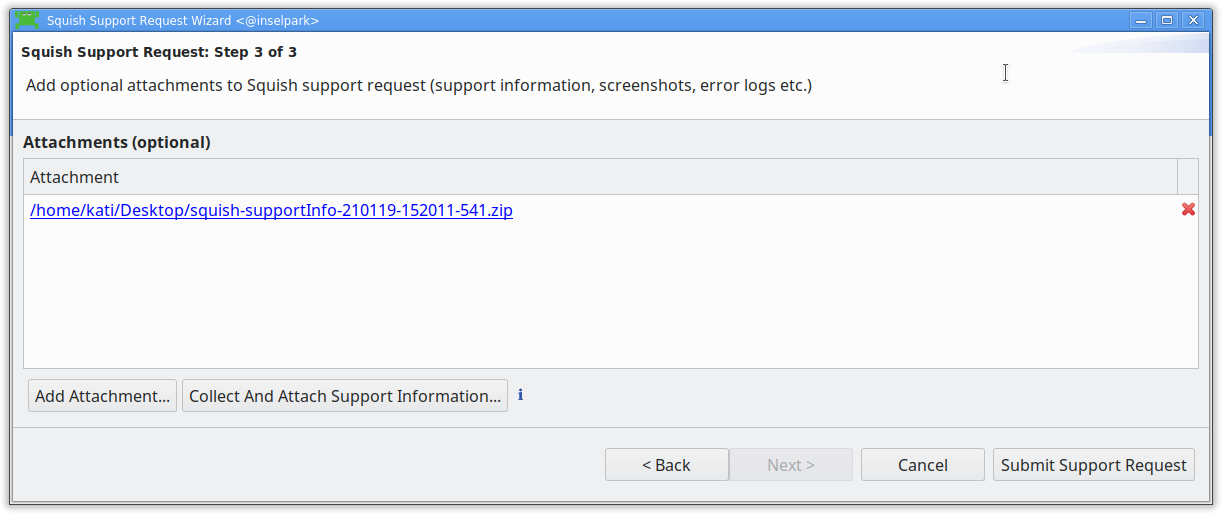
The third step allows users to attach relevant files to their report, including logs, screenshots or configuration files. The 'IDE-collected support information', that is, files including the Squish environment variables and settings, IDE logs, test results, test suite configurations and more, can be easily generated and automatically attached to the support request in this step.
Reporting IDE Exceptions and Crashes
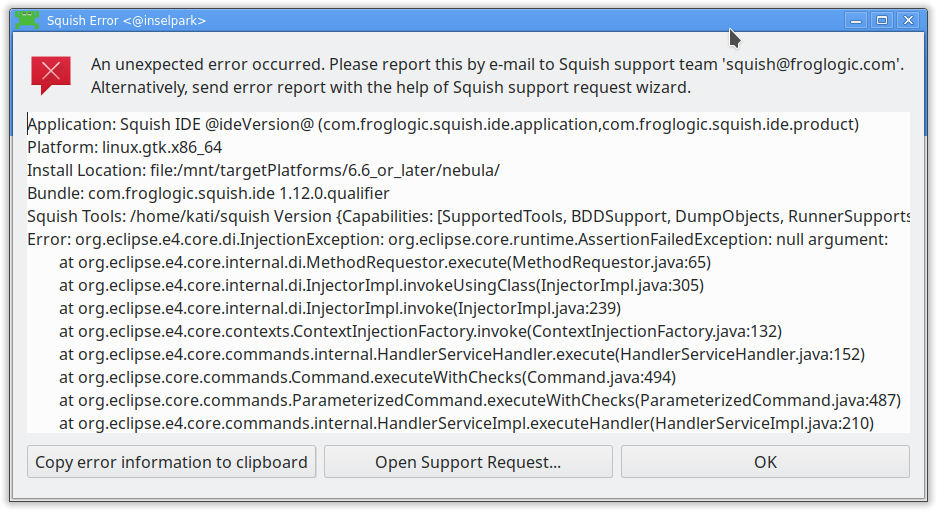
There are two additional ways to open the Squish support request wizard. One, is through the familiar Collect Support Information dialog in the top-level Help menu which now provides a shortcut to open a new support request and attach a freshly created archive with the support information to it. A second way, is a Squish dialog which appears whenever an IDE exception is thrown or a Squish internal error occurs. It is now not only possible to copy the stacktrace to the clipboard (as it has been in the past), but also to invoke the support request wizard and open a new request with the stacktrace or crash report already included in the description.
Submitting Support Requests
After the support request is completed, it can be sent to the Squish support team by clicking on the Submit Support Request button. If successfully submitted, a pop-up dialog with a newly assigned ticket ID appears. The user receives a confirmation e-mail as well.
Any further communication with the Squish support team is then carried out by e-mail. It is not yet possible to view one's open support tickets or to follow-up on them from the IDE, but depending on how the Squish support wizard is received by our users and community, this may become an option in the future.
Let us know what you think of this feature in the comments below!


