Qt Quick 3D: interactive 2D content
January 25, 2022 by Shawn Rutledge | Comments
Qt Quick 3D has some new features in 6.2. One of them is that you can map interactive Qt Quick scenes onto 3D objects.
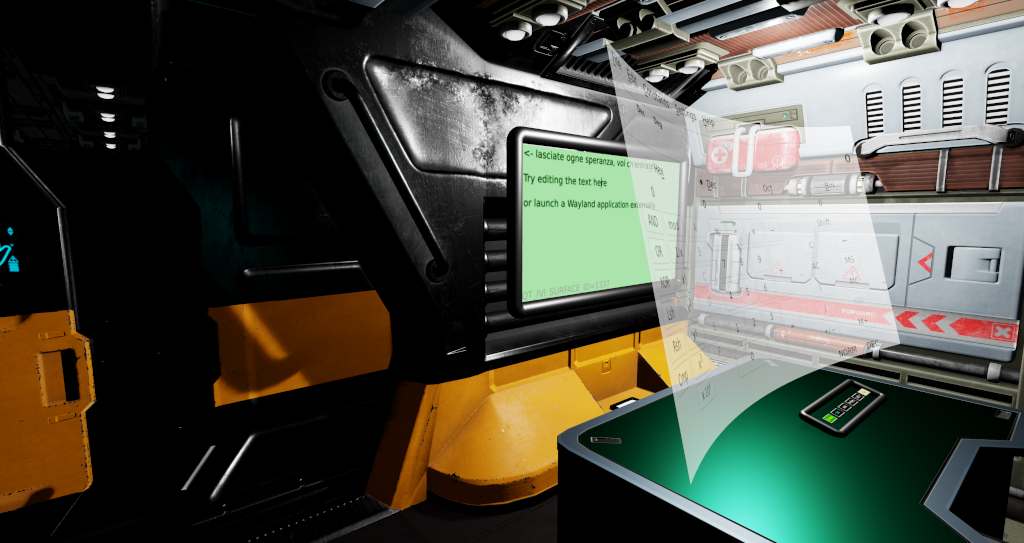
During a hackathon last year, we developed the Kappa Tau Station demo: a model of a space station in which you can use the WASD keys to walk around (as in many games), but also containing some 2D UI elements on some surfaces. For example you can:
- edit the text on the green "blackboard"
- press a 3D button on a keypad on the desk, to launch a Wayland application which will be shown on the screen at that desk (only on Linux)
- interact with the Wayland application (for example, operate kcalc just as you would on your KDE desktop)
- press virtual touchscreens to open the doors or to fire the particle weapon
The demo is available in this respository, along with some others:
https://git.qt.io/public-demos/qtquick3d/-/tree/master/KappaTau
It's worthwhile to read the qml files to see how we did everything.
You have a couple of choices for how to map a 2D scene into a 3D scene. One is to simply declare your 2D items (like a Rectangle, or your own component in another QML file) inside a Node. Then the Node sets the position and orientation of an infinite plane in 3D, onto which the 2D scene is mapped.
import QtQuick
import QtQuick3D

View3D {
    width: 600; height: 480

    environment: SceneEnvironment {
        clearColor: "#111"
        backgroundMode: SceneEnvironment.Color
    }

    PerspectiveCamera { z: 600 }

    DirectionalLight { }

    Node {
        position: "-128, 128, 380"
        eulerRotation.y: 25
        Rectangle {
            width: 256; height: 256; radius: 10
            color: "#444"
            border { color: "cyan"; width: 2 }
            Text {
                color: "white"
                anchors.centerIn: parent
                text: "hello world"
            }
        }
    }
}
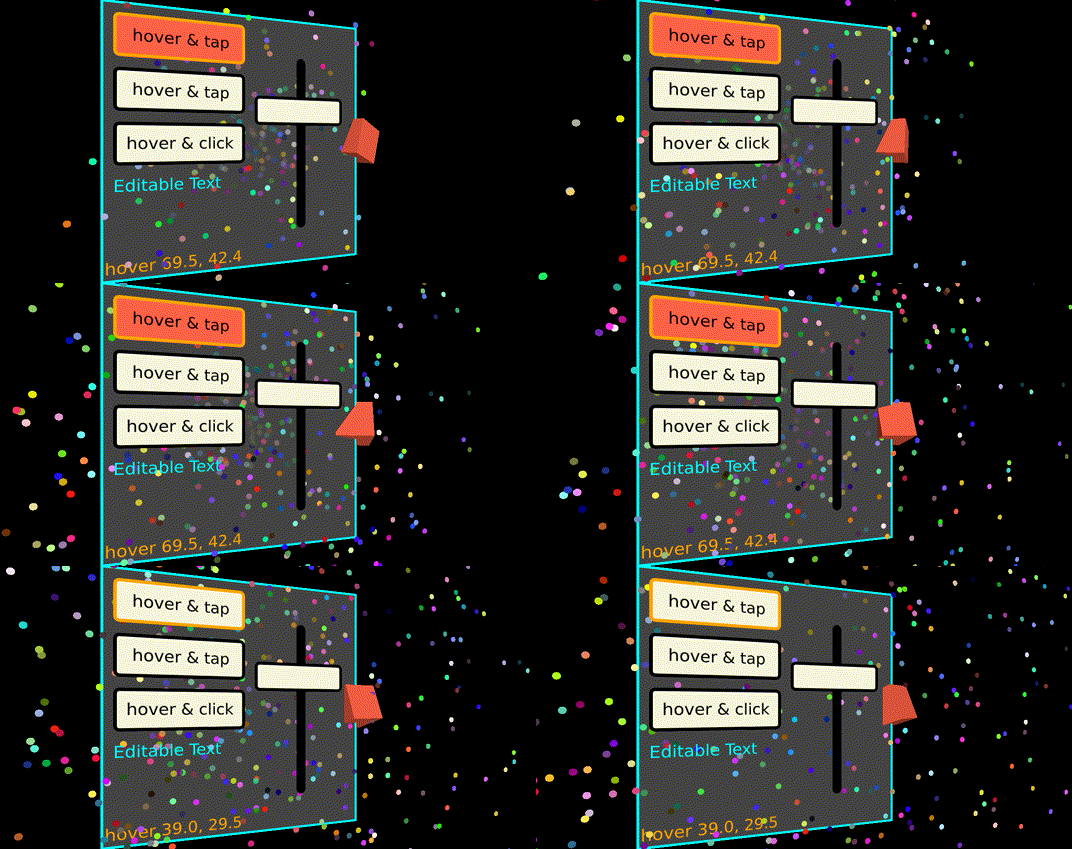
Qt Quick doesn't clip child Items by default, and we don't want to create an arbitrary "edge" here either, so the 2D scene sits on an infinite plane in the unified 2D/3D scene graph. Maybe your scene emits 2D particles that should keep going past the edge of the declared items, for example:

Another way is to map the 2D scene onto the surface of a 3D Model; in that case, it's declared as one of the textures in the Material, as in this snippet from MacroKeyboard.qml:
Model {
    id: miniScreen
    source: "#Rectangle"
    pickable: true  // <-- needed for interactive content
    position: Qt.vector3d(...)
    scale: Qt.vector3d(...)
    materials: DefaultMaterial {
    emissiveFactor: Qt.vector3d(1, 1, 1)
    emissiveMap: diffuseMap
    diffuseMap: Texture {
        sourceItem: Rectangle { // 2D subscene begins here
            width: ...; height: ...
            color: tap.pressed ? "red" : "beige"
            TapHandler { id: tap }
                ...
            }
        }
    }
}
Because the model source is #Rectangle, it will make a limited-size planar subscene; the diffuseMap sets the color at each pixel inside the rectangle by sampling the texture that the 2D scene is rendering. If you only set diffuseMap, you need to apply suitable lighting to this scene to be able to see it. But in this case, we turn on light emission by setting emissiveFactor (the brightness of the red, green and blue channels); and by binding diffuseMap to emissiveMap , the color of each pixel in the 2D scene controls the color emitted from that pixel of the rectangle model. So this will appear like a little glowing mini touchscreen that you could apply to the top of a 3D button, or to some other suitable location in your 3D scene. Because there is a 2D subscene, it provides the opportunity to have a TapHandler; but for example if you want to be able to press the "button", the tap.pressed property can be bound to the z coordinate of the model to make it move down when you press the TapHandler.
In addition to #Rectangle, we have a few more built-in primitive models. If you map a 2D scene onto a #Cube, it will be repeated on each face of the cube, and you'll be able to interact with it on any face. In general, if you are creating your own models (for example in Blender), you need to control the mapping of texture (UV) coordinates to the part of the model where you want the 2D scene (texture) to be displayed.
So far in Qt Quick 3D, interactive content needs to be needs to put into a 2D "subscene" in the 3D scene. (We have done experiments with using input handlers directly on 3D objects, but have not yet shipped this feature.) Making this possible required some extensive refactoring in the Qt Quick event delivery code. Now, each QQuickWindow has a QQuickDeliveryAgent, and each 2D subscene in 3D has a separate QQuickDeliveryAgent. When you press a mouse button or a touchpoint on your application window, the window's delivery agent looks for delivery targets in the outer 2D scene; those items are planar, and as we "visit" each item, most of the time we only need to translate the press point according to the item's position in the scene. But then we come to the View3D, an Item subclass that contains the rendering of your 3D scene: and event delivery gets more complicated. At the time that the press occurs, View3D needs to do "picking": pretend that a ray is being directed downwards into the scene under the press point, find the 3D nodes that the ray intersects, on which facet of the model, at which UV coordinates. Those intersections get sorted by distance from the camera; and then we can continue trying to deliver the event to any items or handlers that might be attached to the 3D objects.
To keep the 2D scene working the same as it has always been in Qt Quick, we need grabbing to continue to work (QPointerEvent::setExclusiveGrabber() and addPassiveGrabber()). So on press, picking is done from scratch; a 2D item or handler may grab the QEventPoint, and that requires us to additionally remember which facet of which 3D model contains which 2D subscene in which the grab occurred. As you continue to drag your finger or your mouse, we need to repeat the ray-casting, but only to find the intersection of the ray with that same 2D scene.
But in general 3D scenes, the models may be moved, rotated and scaled arbitrarily, at any speed; so for delivery of hover events, we cannot assume anything: the models may be moving, and your mouse may be moving too. So delivery of each hover event requires picking in the 3D scene.
Adding a Wayland surface to a 2D scene isn't hard. In the Kappa Tau project, it's confined to compositor.qml (so that when you are running on a non-Linux platform, main.cpp can load View.qml instead, and you will see everything else, without the Wayland functionality). Because the scene contains a set of discrete virtual "screens", it's a good fit for the Wayland IVI extension, to be able to give each "screen" an ID. Externally on the command line, while the demo is running, you can launch arbitrary Wayland applications on those virtual screens by setting the QT_IVI_SURFACE_ID environment variable, e.g.
QT_IVI_SURFACE_ID=2 qml -platform wayland my.qml
We made use of a few more features that are new in 6.2:
- Qt Multimedia, for sound effects
- 3D particles, for the particle weapon, and some bubbles and sparks inside the station
- morphing, for one of the virtual screens to "unfold" as it animates into view
I have little experience writing interactive 3D applications so far, but I found that Qt Quick 3D is easy enough to get started if you already know your way around Qt Quick and QML. So if you ever wanted to build something like that for fun, but thought the learning curve would take too long, you may be pleasantly surprised.
Blog Topics:
Comments
Subscribe to our newsletter
Subscribe Newsletter
Try Qt 6.10 Now!
Download the latest release here: www.qt.io/download.
Qt 6.10 is now available, with new features and improvements for application developers and device creators.
We're Hiring
Check out all our open positions here and follow us on Instagram to see what it's like to be #QtPeople.


